Step 2 - Create a project
In the next article First Step - Development Environment Preparation , let's continue to learn how to create a Newbe.Claptrap project.
Install project templates
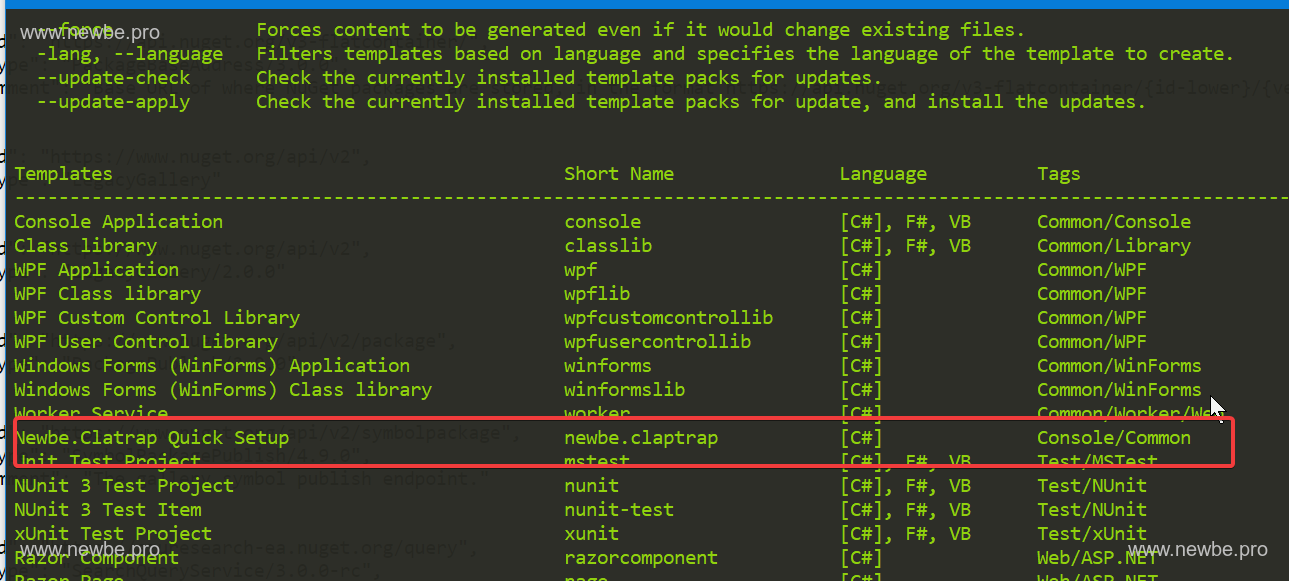
Open the console to run the following commands to install the latest project templates:
dotnet new --install Newbe.Claptrap.Template
Once installed, you can see the project templates that have already been installed in the installation results.
Create a project
Select a location to create a folder, and this example selects theD:\Repo and Create a directory named HelloClaptrap.The folder will be used as a code folder for new projects.
Open the console and switch the work directory toD:\Repo\HelloClaptrap。Then run the following command to create a project:
dotnet new newbe.claptrap --name HelloClaptrap
In general, we recommend that the
D:\Repo\HelloClaptrapshould be created as a Git repository.Manage your source code with version control.
Start the project
Next, we use the command line to start the project.Switch the command line toC:\Repos\HelloClaptrap\HelloClaptrap, run the following command:
tye run
After starting, you can see all the items contained in the project template on the tye dashboard:
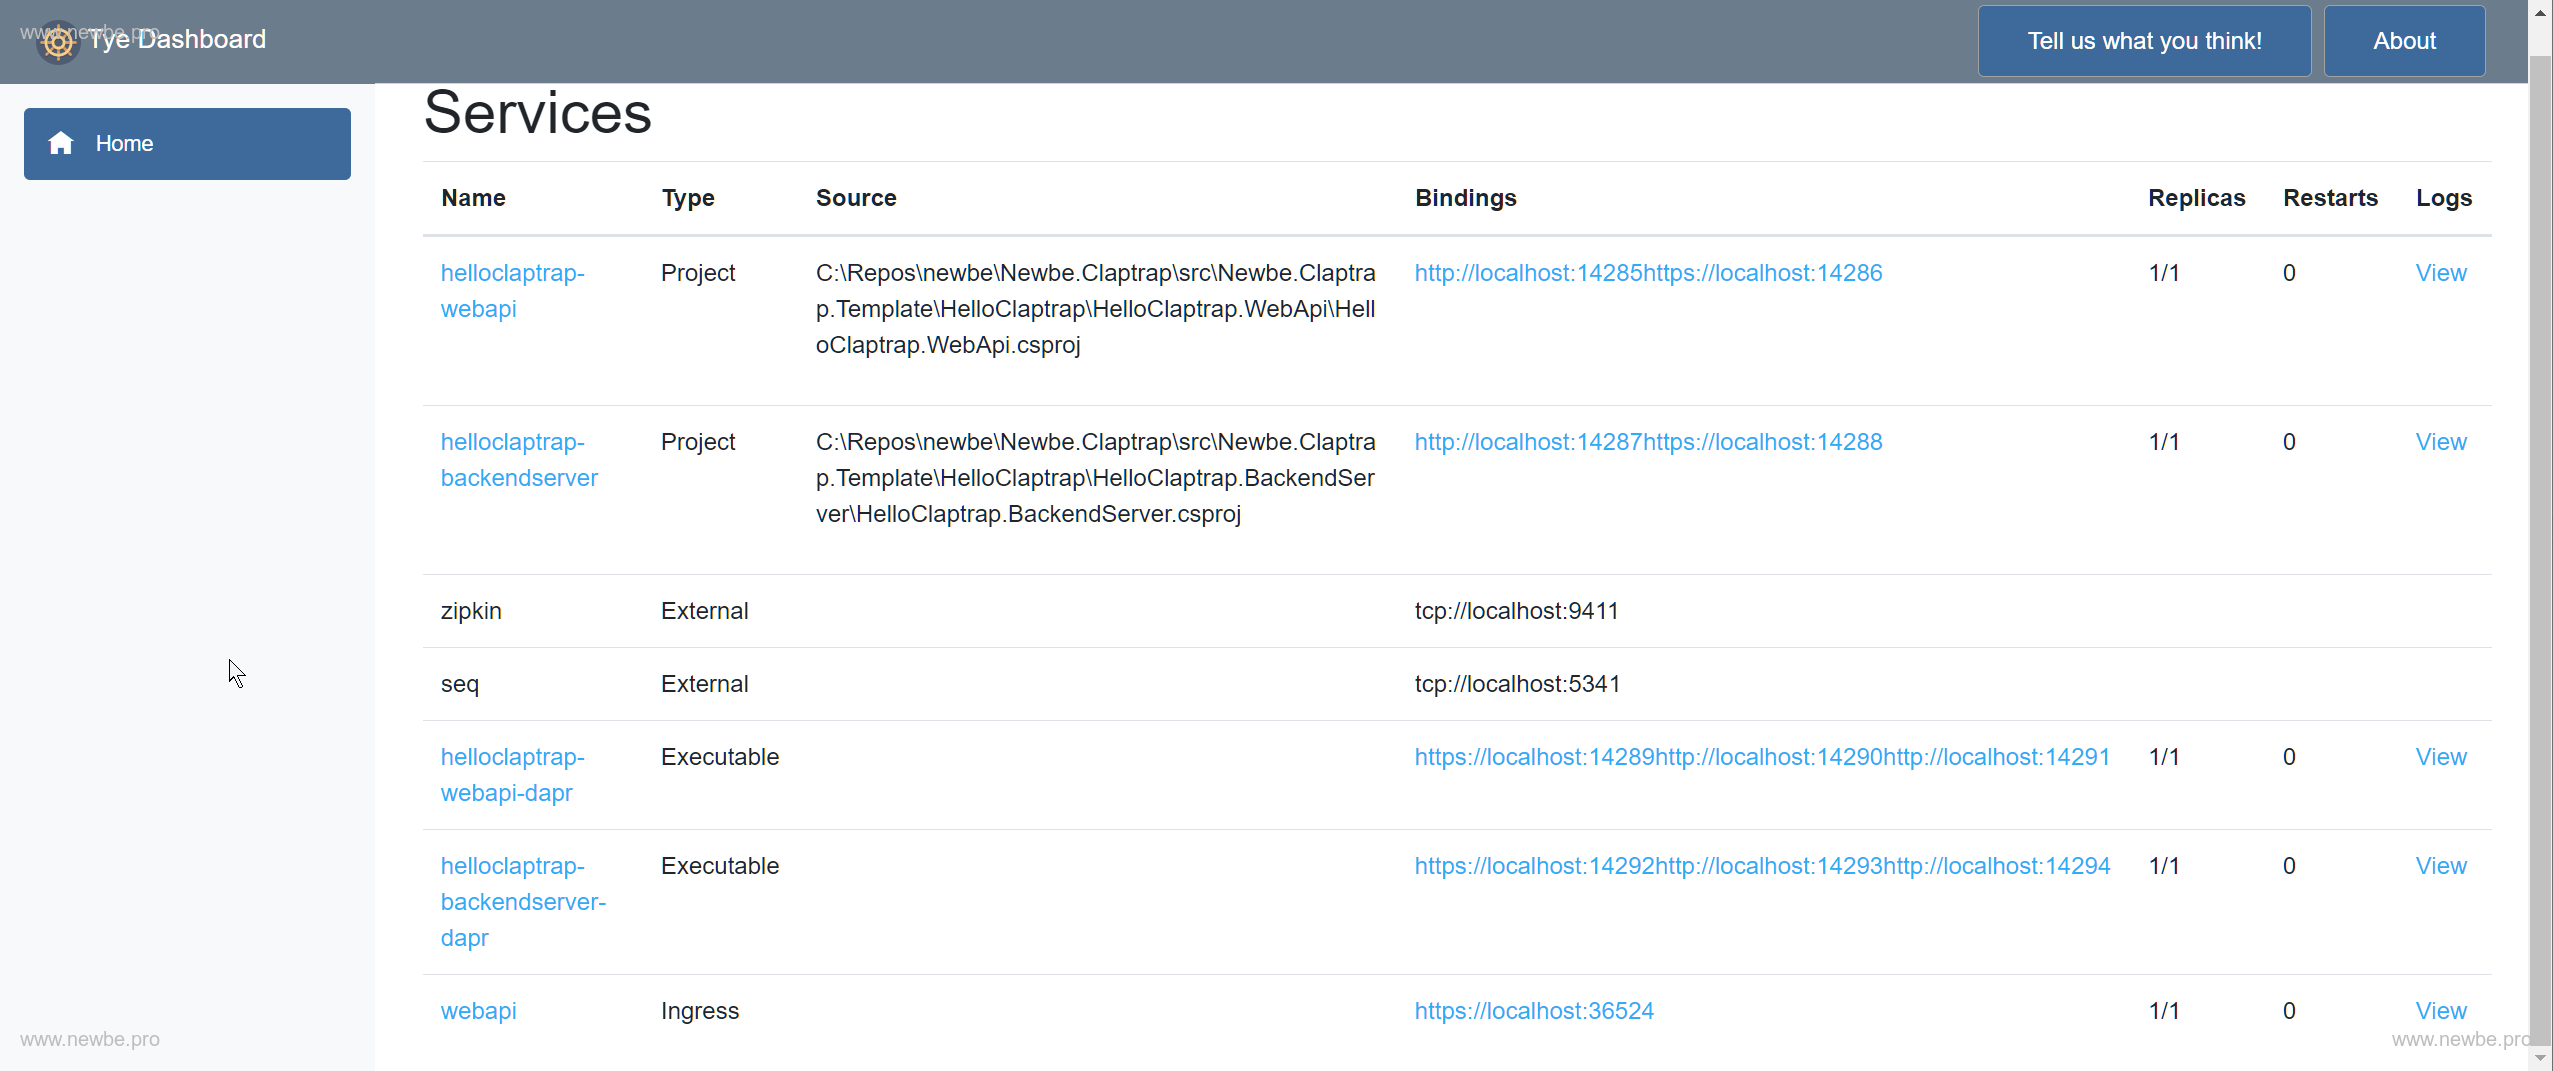
The address of the tye dashboard is typically http://localhost:8000, and if the port is occupied, other ports are automatically used, and you can view the prompts on the command line to get the current specific address.
We can find the address of thehelloclaptrap-webapi service on the interface shown above.For example, as shown in the figure above, its endpoint address ishttp://localhost:14285.
Therefore, we use the browser to open the address to view the swagger interface.
On the swagger page, try calling/AuctionItems/{itemId}/statusAPI:

The response of the service to 200 indicates that the components of the current service have started successfully.
Experience the project
Projects created using project templates are actually a program that simulates auction bidding.
Auction bidding is a typical business scenario that working with concurrent request.Using Newbe.Claptrap can simply solve the problem.We'll continue to use this business scenario for demonstration in subsequent documents, so here's a simple description of the business scenario.
Business rules
The business rules are roughly as follows:
- Each auction itemid is
unique - Auctions can only be auctioned for a period of time
- The auction item has a starting auction price
- All bidders have a unique userid
user - Bidders can bid on an auction item indefinitely during the auction period, and as long as their bid is greater than the current maximum bid, it can be counted as a valid bid and become the current bidder for the auction
- Details of all successful bids, including bid time, bid amount, bidder, need to be recorded.
The status of the auction items is as follows:
0 Plannedwaiting to start shooting1 OnSellOnSell2 Soldhas been shot3 UnSoldUnSold
API design
For the simplest demonstration effect, this example designs the following API :
GET/AuctionItems/{itemId}/statusthe current auction status of the specified auctionGET/AuctionItems/{itemId}details of the specified auction itempost/AuctionItemsbids for designated auction items
Let's use a simple scenario to experience the effects of these APIs.
Look for auction items currently under auction
Since the status of auctions is influenced by time, in order for developers to find auction items in various states at any time, time-based algorithms are used to generate auctions in all states.
Developers can use the 0/1/2/3 four itemId callsGET/AuctionItems/{itemId}/statusthe current status of the auction.
There is at least one auction with 1 OnSell status.For subsequent convenience, let's assume that its itemId is 1.
View details of the auction
Using GET/AuctionItems/{itemId} you can find the details of the auction item.For example, if we query with itemId for 1, we might get the following results:
{
  "state": {
    "biddingRecords": null,
    "basePrice": 10,
    "startTime": "2021-02-27T12:59:12.673013+08:00",
    "endTime": "2021-02-27T16:59:12.673013+08:00"
  }
}
The above results show that:
- The auction starts at basePrice 10
- The auction period is the startTime - endTime time period
- The current auction record is empty
The time period may change depending on the project start time due to the time it takes to start the project template.
Try bidding
Next, we callPOST/AuctionItemsto try to bid on the auction item currently under auction, and call and pass in the parameters as follows:
{
  "userId": 1,
  "price": 36524,
  "itemId": 1
}
The parameters are described below:
- Bidder userId is 1
- Bid 36524
- The auction item Id 1
This will get results:
{
  "success": true,
  "userId": 1,
  "auctionItemStatus": 1,
  "nowPrice": 36524
}
The return results show that:
- The success bid was successful
- Bidder userId is 1
- The latest bid is 36524
- The current status of the auction
1 OnSell
You can the latest auctions{itemId} using the GET/AuctionItems/:
{
  "state": {
    "biddingRecords": {
      "36524": {
        "userId": 1,
        "price": 36524,
        "biddingTime": "2021-02-27T07:31:09.8954519+00:00"
      }
    },
    "basePrice": 10,
    "startTime": "2021-02-27T12:59:12.673013+08:00",
    "endTime": "2021-02-27T16:59:12.673013+08:00"
  }
}
The above results show that:
- Bid records have been updated to include the latest auction details.
This completes the simplest bid presentation.
Developers can experiment with more different status and parameters to experience the underlying usage of the above APIs.For example, a bid is less than the current highest bid, a bid for a non-remake item, and so on.
Stop the project
If you want to stop a template project that is currently running.You can stop a running program by pressingCtrl+Con the control panel where you just rantye run.
Summary
In this article, we learned the basic steps for installing and using project templates.
Next, we'll cover the main elements contained in the project template.